

Introduction
Resin photo frames are a fantastic way to preserve and display your cherished memories. Unlike traditional frames, resin frames offer durability, a unique aesthetic, and the ability to customize in ways you might not have imagined. In this article, we’ll explore five stunning ideas for using resin photo frames to elevate your keepsakes into works of art.
Why Choose Resin Photo Frames?
Resin photo frames aren’t just about protecting your pictures — they’re about turning them into beautiful decor pieces. Resin is a highly versatile material that allows for endless creativity. You can embed objects, add color pigments, or even personalize frames to reflect a specific memory or style.
5 Creative Resin Photo Frame Ideas
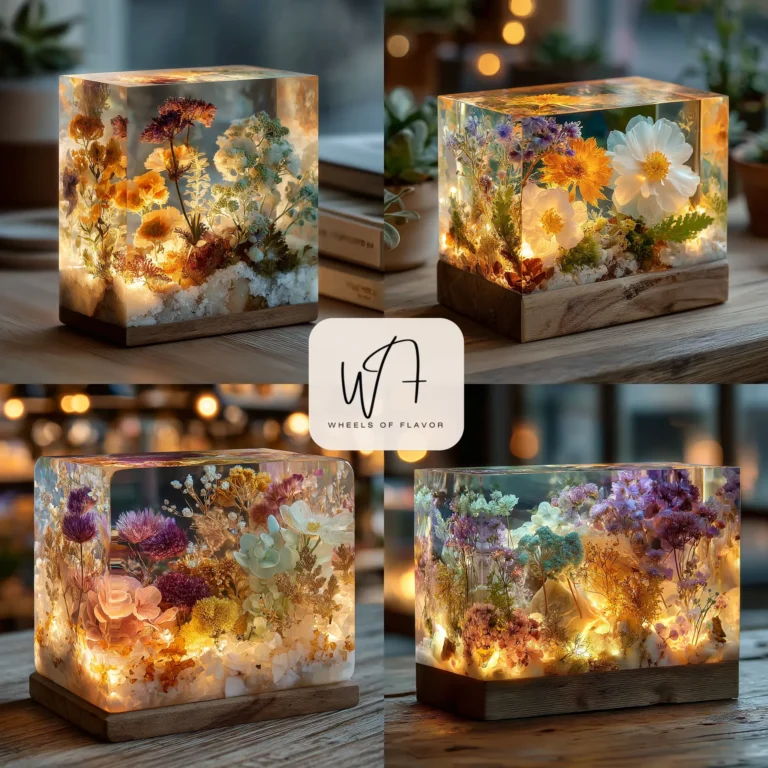
Beach Memory Frames
Embed sand, tiny shells, and pebbles into the resin to recreate your favorite seaside moments. These frames make perfect souvenirs from beach vacations.Floral Embedded Frames
Press dried flowers or leaves into the resin for a delicate, natural look. Great for weddings, anniversaries, or spring-themed memories.Glow-in-the-Dark Frames
Add glow powder or phosphorescent pigments to the resin to create frames that subtly light up in the dark — perfect for children’s rooms or dreamy settings.Personalized Name Frames
Use alphabet beads, stickers, or embedded letters to customize the frame with a name, date, or message, adding a truly personal touch.Layered Photo Frames
Create a 3D effect by layering small decorative items like glitter, dried petals, or even mini keepsakes between multiple resin pours.
How to Make Your Own Resin Photo Frame
Creating your own resin frame is a fun and rewarding project. Here’s a quick overview:
Choose a mold (silicone molds work best).
Mix your resin and hardener according to package instructions.
Add your decorative elements — flowers, shells, glow powder, etc.
Pour the resin into the mold and let it cure for 24–48 hours.
Pop it out of the mold and insert your photo!
💡 For a step-by-step tutorial, check out this high-authority DIY guide.
Caring for Your Resin Photo Frame
To keep your frame looking its best:
Avoid direct sunlight for long periods (resin can yellow).
Clean gently with a soft, damp cloth.
Do not use harsh chemicals or abrasives.
Where to Display Your Resin Photo Frame
Resin photo frames are eye-catching and versatile, perfect for:
Living rooms and bedrooms
Office desks or workspaces
Gallery walls
Mantels and shelves
They also make thoughtful handmade gifts for friends and family.
Frequently Asked Questions (FAQ)
Q: How long does resin take to dry?
A: Typically, 24–48 hours, depending on the brand and temperature.
Q: Can I use any photo in a resin frame?
A: Yes, but seal or laminate the photo to protect it from the resin.
Q: Are resin photo frames expensive?
A: Store-bought ones can be, but DIY frames are budget-friendly and highly customizable.
Q: How do I clean my resin photo frame?
A: Use a soft, damp cloth. Avoid chemical cleaners.
Q: Can children make resin photo frames?
A: Yes — with adult supervision. Resin can be toxic if mishandled, so always follow safety guidelines.
Final Thoughts
Whether you’re preserving a special moment or crafting a handmade gift, resin photo frames offer endless creative potential. Try one of the ideas above and add a personal, artistic flair to your cherished memories.
👉 Looking for more creative ideas? Visit Wheels of Flavor.
Would you like this turned into a downloadable PDF or optimized for SEO next?