

Creating a pea gravel patio is a fantastic way to enhance your outdoor living area with minimal effort and cost. Pea gravel, known for its smooth texture and versatility, offers a durable and aesthetically pleasing solution for patios, pathways, and garden accents. This guide will explore the benefits of choosing pea gravel for your patio, including its affordability, ease of installation, and low maintenance requirements. Whether you’re looking to create a cozy outdoor nook or a spacious entertainment area, a pea gravel patio can be customized to fit any style and space. Dive into our comprehensive guide to discover how you can transform your outdoor space with this simple yet effective material.
Why Choose a Pea Gravel Patio for Your Home
Pea gravel patios stand out for their unique blend of functionality and aesthetic appeal. Unlike traditional paving materials, pea gravel is budget-friendly and can be installed without professional help. Its natural look complements any garden design, from rustic to modern. Additionally, pea gravel provides excellent drainage, preventing water accumulation and reducing the risk of slipping. This section will delve into the myriad benefits of pea gravel patios, showcasing why they are a top choice for homeowners seeking both beauty and practicality in their outdoor spaces.
Step-by-Step Guide to Building Your Pea Gravel Patio
Building a pea gravel patio is a straightforward process that can be completed over a weekend. Start by outlining your patio area and removing any grass or weeds. Next, lay a landscape fabric to prevent weed growth and ensure stability. Then, install edging materials to contain the gravel. Finally, spread the pea gravel evenly across the area. This section provides a detailed, easy-to-follow guide on each step, including tips for selecting the right thickness of gravel and ensuring proper drainage for a long-lasting patio.
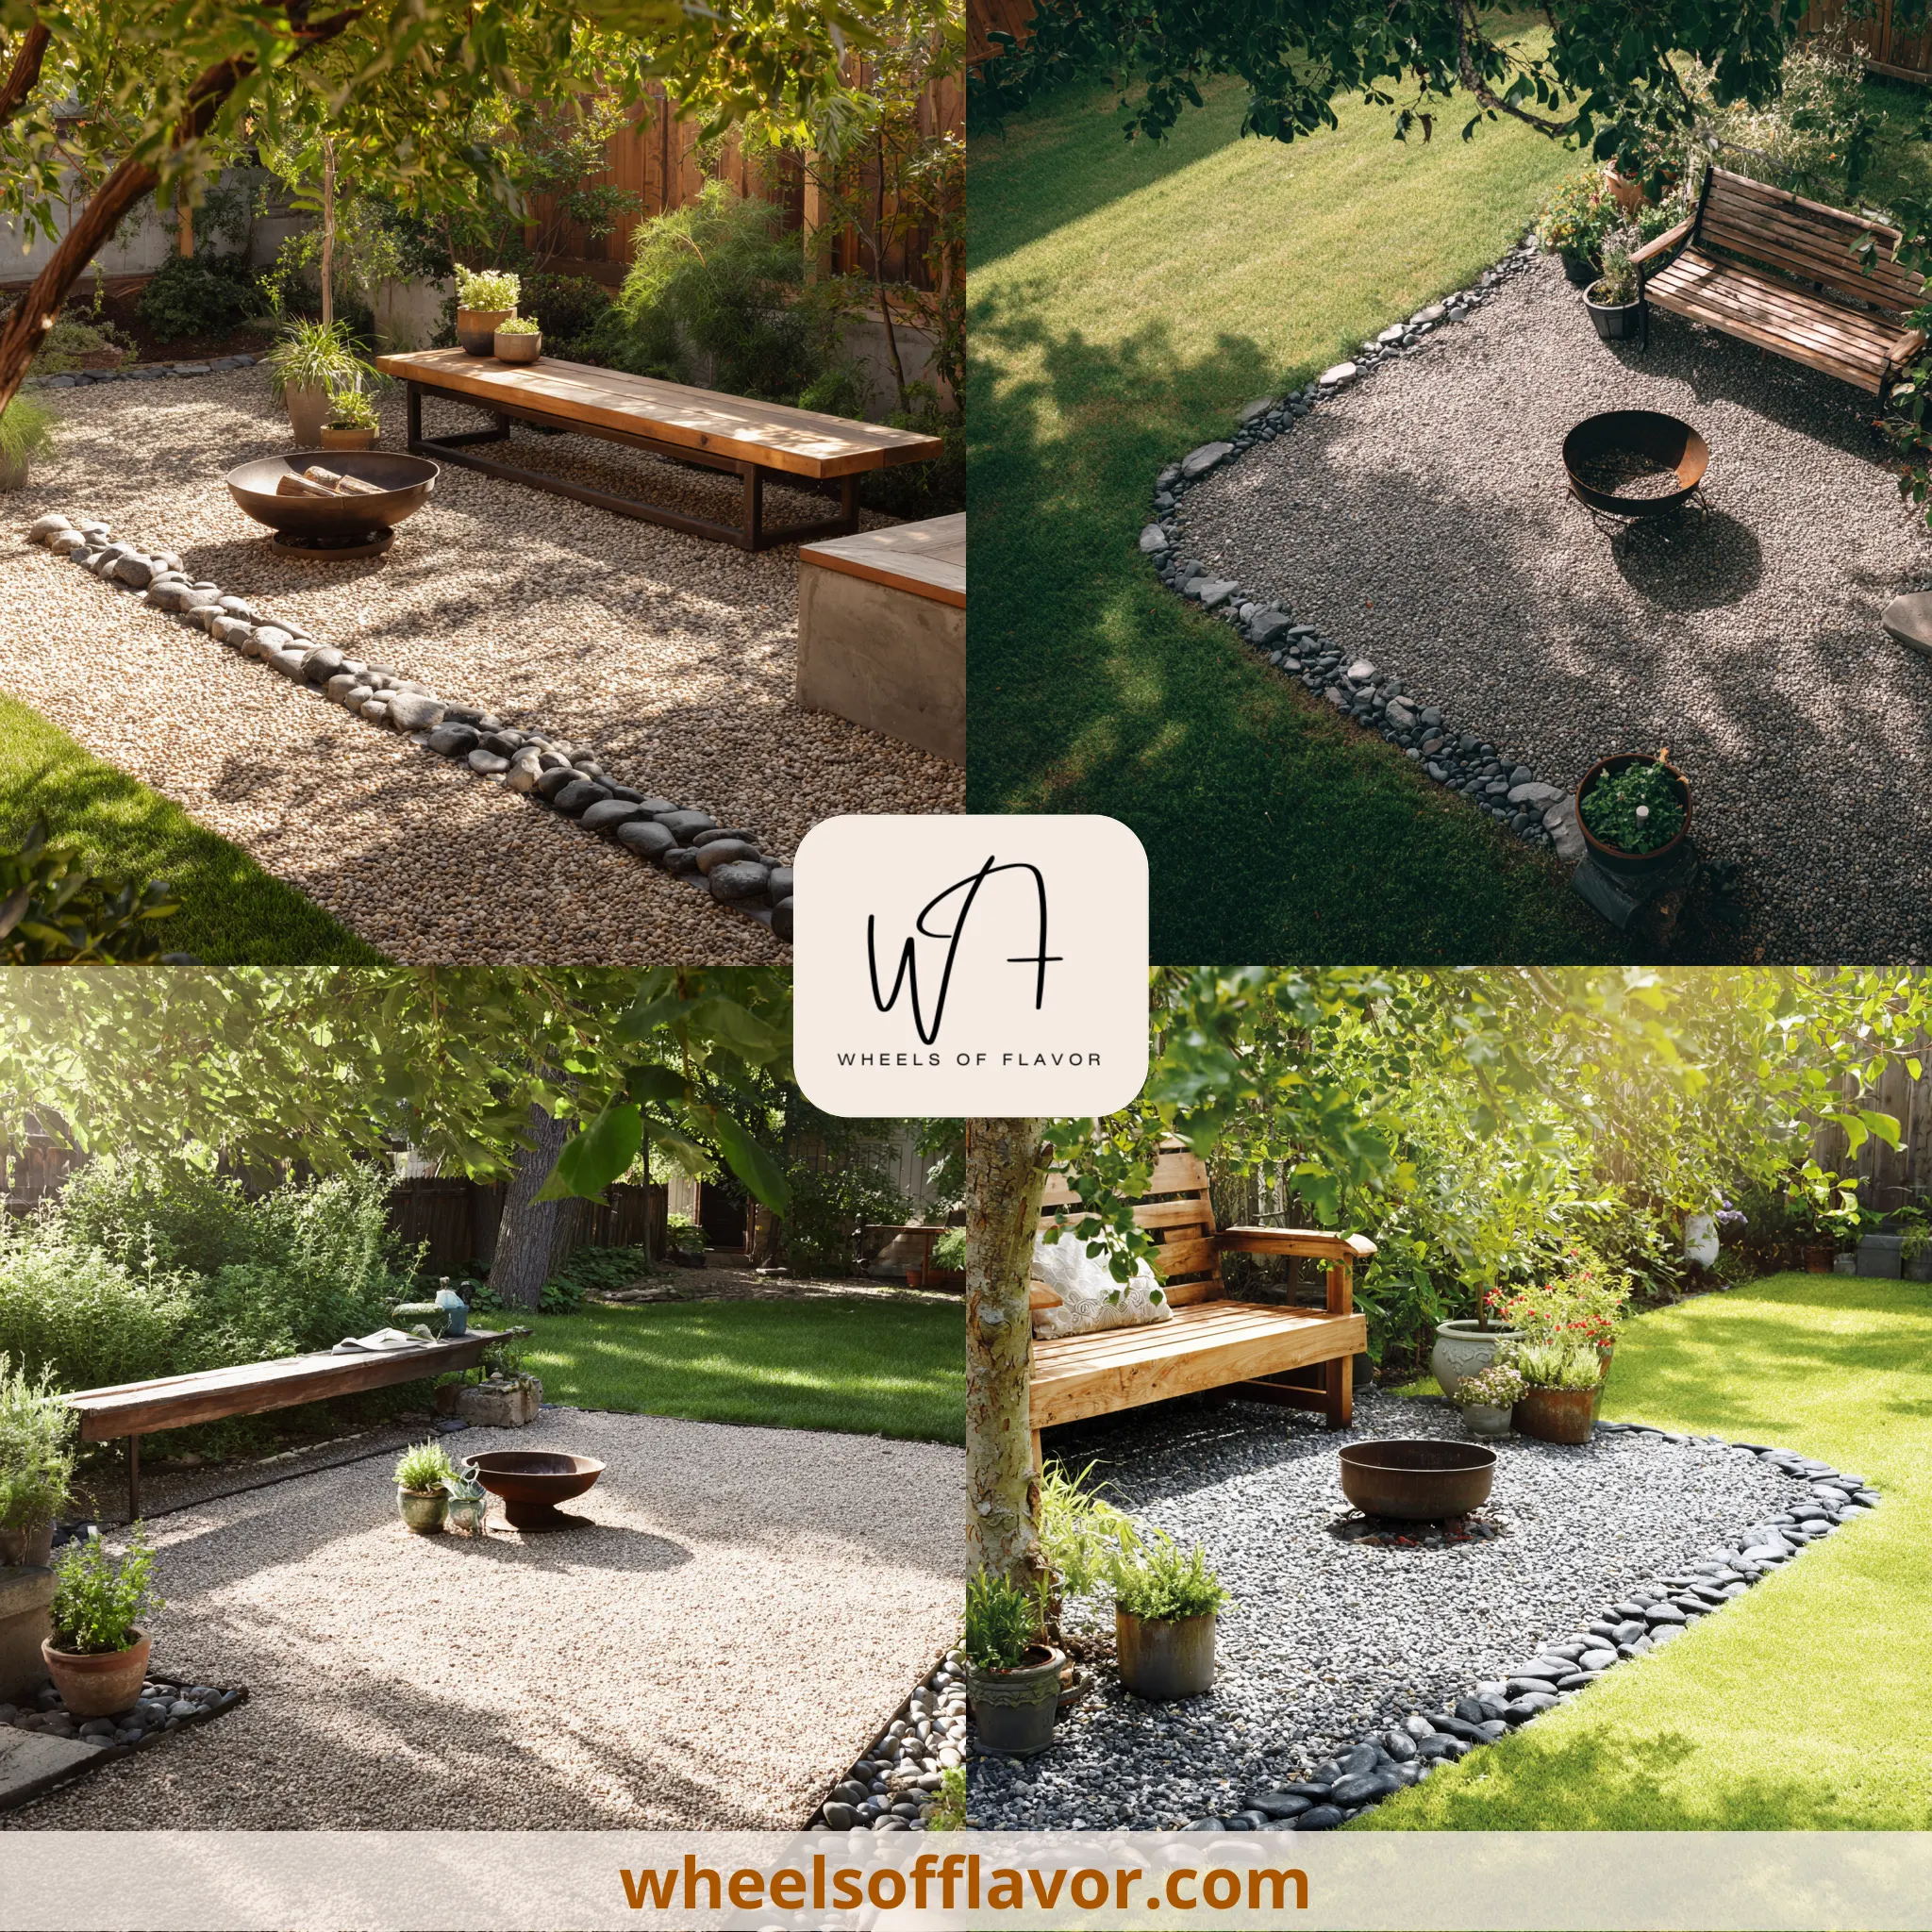
Creative Design Ideas for Your Pea Gravel Patio
A pea gravel patio offers endless design possibilities to match your personal style and outdoor needs. Consider incorporating stepping stones for a walkway effect or mixing different gravel colors for a unique look. Adding outdoor furniture, fire pits, or planters can enhance the functionality and charm of your patio. This section explores creative ideas to personalize your pea gravel patio, ensuring it becomes a favorite spot for relaxation and entertainment.
Conclusion
A pea gravel patio is an excellent choice for anyone looking to upgrade their outdoor space with minimal expense and effort. Its versatility, durability, and aesthetic appeal make it a superior option for various outdoor projects. By following the steps and ideas outlined in this guide, you can create a beautiful and functional patio that suits your lifestyle and enhances your home's exterior. Looking ahead, the trend towards sustainable and low-maintenance landscaping solutions like pea gravel patios is expected to grow, offering even more opportunities for creative outdoor designs.
Frequently Asked Questions
Q: How much pea gravel do I need for my patio?
The amount of pea gravel needed depends on the size of your patio and the depth of gravel you plan to use. A general rule is to calculate the volume in cubic yards by multiplying the length by the width by the depth (in feet) and then dividing by 27. For most patios, a depth of 2 to 3 inches is recommended.
Q: Is a pea gravel patio suitable for all climates?
Pea gravel patios are adaptable to various climates but may require additional maintenance in areas with heavy rainfall or freezing temperatures. Proper drainage and occasional raking can help maintain the patio's appearance and functionality in challenging weather conditions.
Q: Can I install a pea gravel patio myself?
Yes, installing a pea gravel patio is a DIY-friendly project. With basic tools and materials, such as landscape fabric, edging, and the gravel itself, most homeowners can complete the installation over a weekend. Following a step-by-step guide ensures a smooth and successful project.