

Gnome rock painting has become a beloved hobby for crafters and garden enthusiasts alike, offering a simple yet magical way to personalize outdoor spaces. This creative activity involves painting small to medium-sized rocks to resemble whimsical gnomes, complete with pointy hats, rosy cheeks, and friendly expressions. The importance of gnome rock painting ideas lies in their ability to transform ordinary stones into charming decorations that add character and joy to gardens, patios, or indoor displays. Not only is it an affordable and accessible DIY project, but it also encourages mindfulness and creativity, making it perfect for individuals, families, or community groups. By exploring various gnome rock painting ideas, you can unleash your artistic side while creating unique pieces that reflect your personality. In today’s fast-paced world, such hands-on activities provide a therapeutic escape, reducing stress and fostering a sense of accomplishment. Whether you’re a beginner or an experienced painter, these ideas can inspire you to craft delightful gnomes that brighten up any environment. Plus, it’s an eco-friendly way to repurpose rocks, aligning with sustainable living trends. Dive into this guide to discover how gnome rock painting can enhance your home decor and bring a touch of whimsy to your daily life.
Beginner-Friendly Gnome Rock Painting Ideas
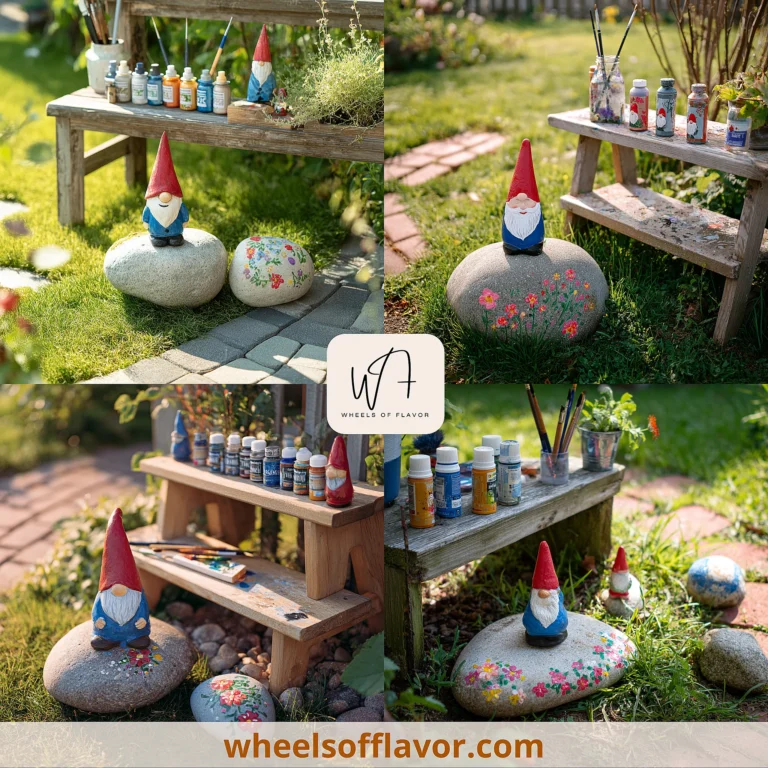
If you're new to gnome rock painting, start with simple and approachable ideas that require minimal supplies. Begin by selecting smooth, flat rocks that are easy to paint on; river rocks or garden stones work well. Use acrylic paints for their durability and vibrant colors, and opt for basic brushes to outline the gnome's features. A classic beginner idea is to paint a gnome with a solid-colored body and a contrasting hat—for instance, a red hat on a white rock base. Add small details like eyes, a nose, and a smile using a fine brush or even a toothpick for precision. Don't worry about perfection; the charm of gnomes often lies in their quirky, handmade look. Seal your creation with a clear outdoor varnish to protect it from weather elements if placed outside. For inspiration, check out this guide on easy rock painting techniques from The Spruce Crafts, a trusted resource for DIY enthusiasts. As you practice, you'll build confidence and develop your own style. Remember, the goal is to have fun and create something that makes you smile. These beginner gnome rock painting ideas are perfect for kids and adults alike, offering a relaxing way to spend an afternoon. With a bit of patience, you'll soon have a collection of adorable gnomes to display in your garden or give as heartfelt gifts.
Creative Gnome Rock Painting Ideas for Seasonal Themes
Elevate your gnome rock painting by incorporating seasonal themes that add variety and festivity to your decor. For spring, paint gnomes with pastel colors, floral patterns on their hats, or even tiny painted flowers at their feet to celebrate renewal and growth. Summer ideas might include beach-themed gnomes with sunglasses, seashell accents, or bright, sunny colors that evoke warmth and vacation vibes. In autumn, focus on earthy tones like oranges, browns, and reds; add details such as fallen leaves, pumpkins, or a subtle gradient to mimic the changing foliage. Winter gnome rock painting ideas can feature snowy scenes, with white hats and coats, glitter for frost effects, or even a Santa-inspired gnome for holiday cheer. To achieve these looks, use seasonal color palettes and consider adding textural elements like mod podge for a glossy finish or small accessories glued on for dimension. Seasonal gnome rock painting not only keeps your projects fresh and engaging but also allows you to rotate decorations throughout the year, keeping your space dynamic. For more seasonal craft inspiration, visit https://wheelsofflavor.com/diy-projects, where you'll find related ideas to complement your gnome creations. Embrace the changing seasons with these imaginative approaches, and watch as your gnome collection grows into a year-round celebration of nature's beauty.
Advanced Gnome Rock Painting Ideas with Detailed Techniques
For those with some painting experience, advanced gnome rock painting ideas offer opportunities to showcase skill and creativity through intricate designs and techniques. Start by experimenting with shading and highlighting to add depth to your gnomes; use a dry brush method to create texture on hats or clothing, making them look more realistic. Incorporate mixed media by adding small beads for eyes, yarn for beards, or even miniature accessories like tiny painted tools to give your gnomes personality and story. Another advanced idea is to paint scenes on the rocks, such as a gnome in a forest setting with background elements like trees or mushrooms, using layering to achieve a 3D effect. Consider using stencils for precise patterns or freehand drawing for unique, one-of-a-kind pieces. Advanced techniques also include using epoxy resin for a glossy, durable finish that makes colors pop, especially for outdoor displays. Remember to work in a well-ventilated area and take your time with details to avoid mistakes. These advanced gnome rock painting ideas can result in stunning artworks that serve as focal points in your garden or home. They challenge your abilities and allow for endless customization, making each gnome a true masterpiece. As you progress, share your creations online or in community groups to inspire others and get feedback for continuous improvement.
Conclusion
In summary, gnome rock painting is a delightful and versatile craft that offers something for everyone, from beginners to advanced artists. We've explored a range of gnome rock painting ideas, starting with simple techniques that build foundational skills, moving through seasonal themes that keep your projects engaging year-round, and culminating in advanced methods that allow for artistic expression and detail. This hobby not only enhances your living spaces with whimsical decor but also promotes relaxation, creativity, and a connection to nature through the use of natural materials. As you continue your gnome rock painting journey, remember that the best ideas often come from experimentation and personal inspiration. Look to the future by joining online communities or local workshops to share tips and discover new trends. For actionable insight, set a goal to create a small gnome village in your garden, using these ideas to populate it with unique characters. Embrace the joy of crafting and let your imagination run wild—each painted rock is a step toward a more colorful and joyful home environment. Keep exploring, and soon you'll have a collection that tells a story and brings smiles to all who see it.
Frequently Asked Questions
Q: What type of paint is best for gnome rock painting?
Acrylic paint is highly recommended for gnome rock painting due to its versatility, quick drying time, and durability. It adheres well to rock surfaces and comes in a wide range of colors, making it ideal for both indoor and outdoor projects. For outdoor gnomes, use a sealant like outdoor varnish or mod podge to protect the paint from weather damage. Avoid water-based paints that may wash away easily, and always test paints on a small area first to ensure good coverage.
Q: How can I make my gnome rock paintings last longer outdoors?
To ensure your gnome rock paintings withstand outdoor conditions, start by cleaning and drying the rocks thoroughly before painting. Use high-quality acrylic paints and apply multiple thin coats for even coverage. After the paint dries completely, seal it with a clear outdoor-rated varnish or polyurethane sealant, applying two or three coats for maximum protection. Place the painted rocks in sheltered areas, such as under eaves or in covered garden spots, to minimize exposure to direct sunlight and rain. Regularly inspect and touch up any wear to keep them looking fresh for years.
Q: Can children participate in gnome rock painting, and what safety tips should I follow?
Yes, children can enjoy gnome rock painting with proper supervision. It's a fun family activity that encourages creativity. Choose non-toxic, child-safe acrylic paints and brushes, and work in a well-ventilated area. Supervise closely to prevent ingestion of materials, and cover surfaces with newspapers or drop cloths to avoid mess. For younger kids, opt for simpler designs and assist with finer details. After painting, ensure all materials are stored safely out of reach. This activity is not only safe but also educational, helping kids develop fine motor skills and artistic expression.