
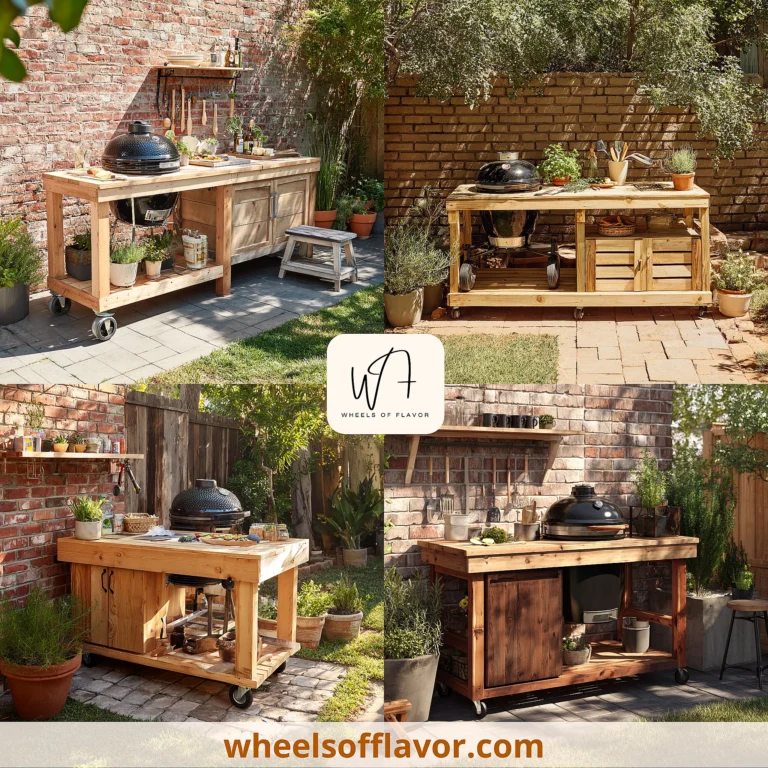
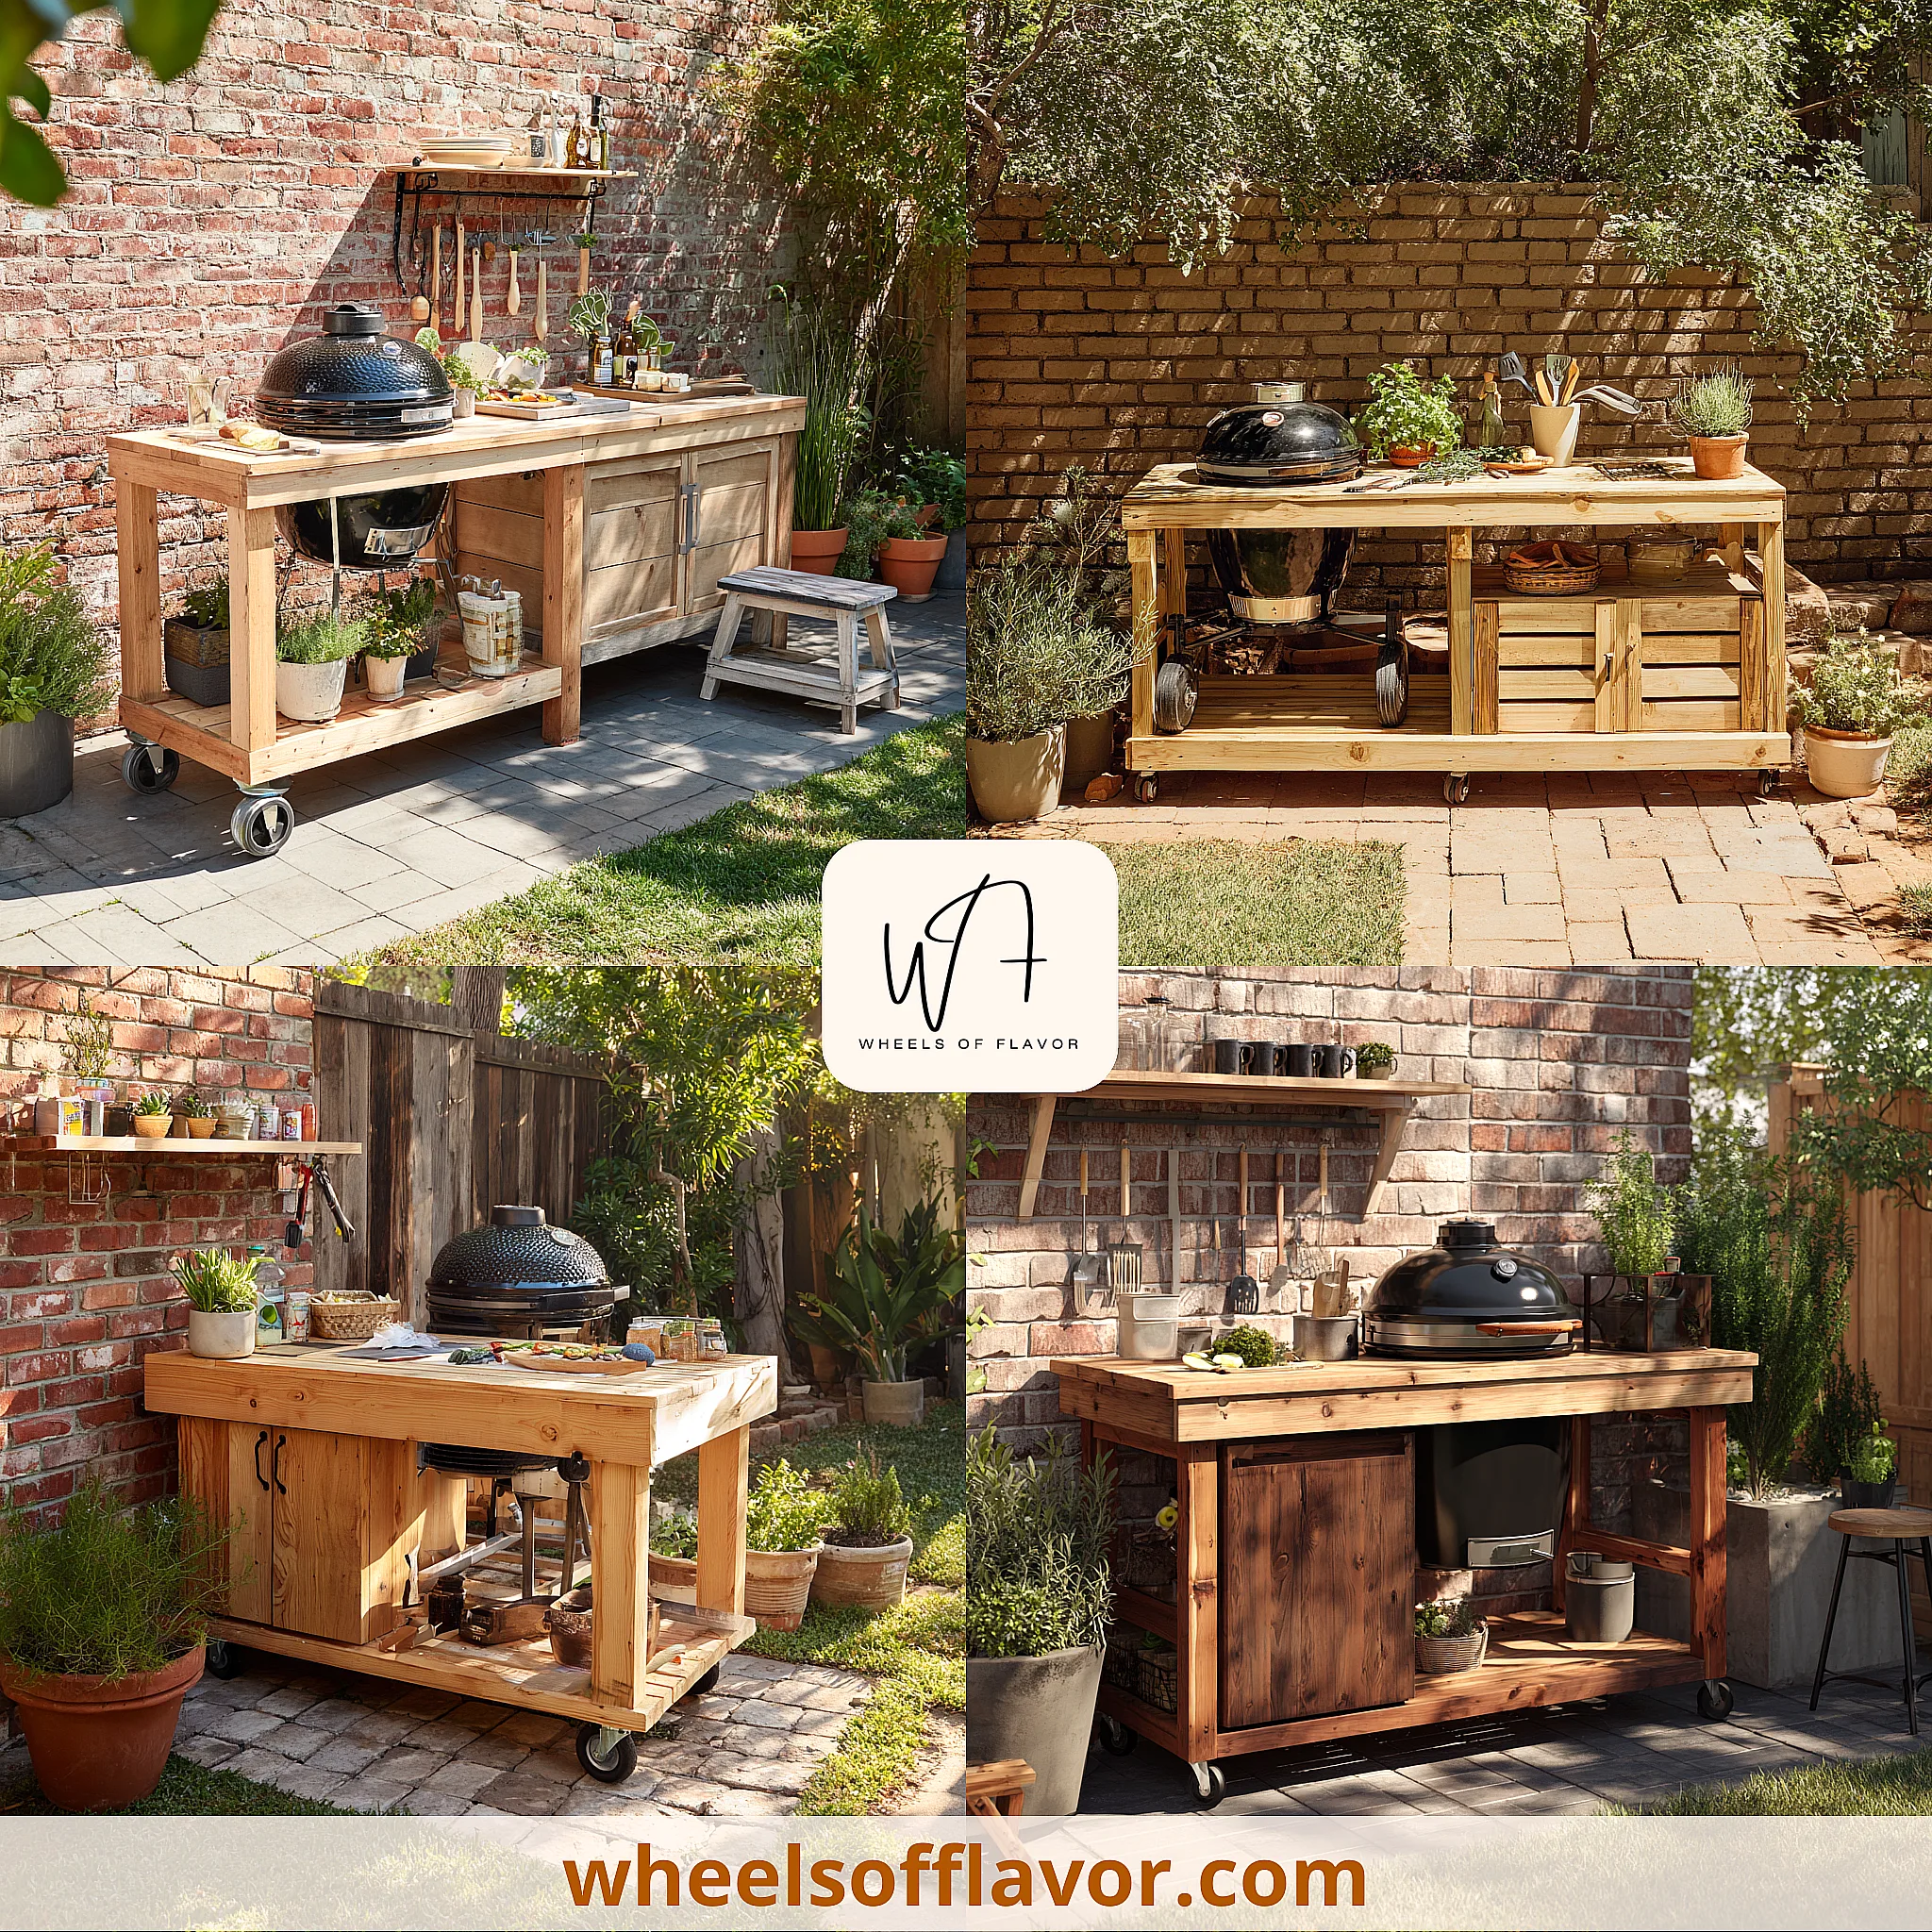
Building an outdoor kitchen with DIY wood projects is a fantastic way to enhance your backyard living space. It not only adds functional value for cooking and entertaining but also brings a warm, natural aesthetic that complements any garden or patio. In today’s world, where outdoor gatherings have become more popular, having a custom-built wood kitchen can transform your home into a hub for family and friends. DIY approaches make it budget-friendly and allow for personalization to suit your style and needs. Whether you’re a seasoned DIY enthusiast or a beginner, working with wood offers versatility and satisfaction. Plus, it’s an eco-friendly choice if you source sustainable materials. This guide will walk you through essential steps and tips for creating your own outdoor kitchen, ensuring it’s durable, stylish, and perfect for your outdoor adventures. Embrace the joy of building something with your own hands and elevate your outdoor experience.
Planning Your Outdoor Kitchen DIY Wood Project
Before you start building, careful planning is key to a successful outdoor kitchen DIY wood project. Begin by assessing your space: measure the area, consider the layout, and think about how you'll use it. Will it be for grilling, prepping food, or socializing? Sketch a simple design that includes countertops, storage, and cooking zones. Choose the right type of wood; cedar, redwood, or pressure-treated lumber are excellent for outdoor use due to their resistance to moisture and insects. Budget is crucial—set a realistic amount for materials and tools. List all necessary items, such as wood, screws, sealants, and hardware. Don't forget to check local building codes or homeowners' association rules. A well-thought-out plan saves time and prevents mistakes. For inspiration, visit this guide on outdoor DIY projects. Start small if you're new to woodworking, and remember, patience pays off in creating a functional and beautiful space.
Essential Tools and Materials for Outdoor Kitchen DIY Wood
Gathering the right tools and materials is essential for your outdoor kitchen DIY wood build. You'll need basic woodworking tools like a saw, drill, measuring tape, and level. For materials, opt for durable woods that can withstand the elements. Cedar is a popular choice for its natural resistance to decay, while pressure-treated pine is affordable and strong. Include hardware such as outdoor-rated screws, hinges for doors, and waterproof sealants to protect the wood from weather damage. Consider adding features like a countertop made from granite or tile for heat resistance. Safety gear like gloves and goggles is a must. If you're incorporating a grill or sink, plan for plumbing or gas lines with professional help if needed. Keep it simple: start with a basic structure and expand over time. For more tips on selecting materials, check out resources from experts. With the right setup, your DIY project will be both enjoyable and long-lasting.
Step-by-Step Building Process for Outdoor Kitchen DIY Wood
Follow this step-by-step process to build your outdoor kitchen DIY wood setup. First, prepare the site: clear the area, level the ground, and lay a foundation if needed, such as pavers or a concrete slab. Cut the wood according to your design plans, assembling the frame for countertops and cabinets. Use sturdy joints and reinforce with brackets for stability. Install the countertop, ensuring it's level and secure. If adding a grill, cut an opening and secure it in place. Apply a waterproof sealant to all wood surfaces to protect against rain and sun. Add finishing touches like shelves or hooks for utensils. Test everything for functionality before finalizing. Take your time and double-check measurements to avoid errors. For detailed tutorials, explore projects on https://wheelsofflavor.com/diy-outdoor-kitchens. Remember, building with wood allows for creativity—customize it to fit your style and needs. Enjoy the process and the delicious meals to come!
Conclusion
In summary, creating an outdoor kitchen with DIY wood projects is a rewarding endeavor that enhances your home's functionality and appeal. By planning carefully, using the right materials, and following a structured building process, you can achieve a durable and stylish space perfect for cooking and entertaining. This project not only adds value to your property but also provides a sense of accomplishment. As outdoor living continues to grow in popularity, investing time in such DIY efforts can lead to years of enjoyment. Look ahead by maintaining your kitchen with regular sealing and repairs to ensure it lasts. Consider expanding with additional features like a pizza oven or bar area. Embrace the DIY spirit and inspire others to try their hand at woodworking. For more ideas and support, visit online communities or local workshops. Start your project today and transform your backyard into a culinary paradise!
Frequently Asked Questions
Q: What type of wood is best for an outdoor kitchen DIY project?
Cedar, redwood, and pressure-treated lumber are top choices for outdoor kitchens due to their natural resistance to moisture, insects, and decay. Cedar offers a beautiful grain and durability, while pressure-treated wood is cost-effective and strong. Always use a waterproof sealant to extend the life of the wood.
Q: How do I protect my DIY wood outdoor kitchen from weather damage?
Apply a high-quality waterproof sealant or stain specifically designed for outdoor use. Reapply it every 1-2 years, depending on exposure. Cover the kitchen during harsh weather or use a waterproof tarp. Regular maintenance, such as cleaning and inspecting for rot, will help keep it in good condition.
Q: Can I build an outdoor kitchen DIY wood project without prior experience?
Yes, beginners can tackle this project by starting with simple designs and using online tutorials or guides. Focus on basic structures like a countertop with storage, and gradually add complexity. Tools like pre-cut wood kits can make it easier. Always prioritize safety and take your time to learn as you go.