
Giving your space a fresh and stylish update doesn’t have to be expensive. One of the best ways to transform your bathroom is by DIY painting bathroom cabinets. With the right techniques and materials, you can achieve a professional look while saving money. Whether you want a modern, classic, or bold style, painting your cabinets is an easy way to refresh your bathroom’s appearance.
Table of Contents
1. Choose the Right Paint for Bathroom Cabinets
The first step in DIY painting bathroom cabinets is selecting the right type of paint. Since bathrooms are humid and exposed to water, it’s essential to use a durable, moisture-resistant paint.
- Best Paint Options:
- Oil-based paint for a hard, durable finish
- Latex paint with a satin or semi-gloss finish for easy cleaning
- Cabinet-specific paint for long-lasting results
Using a high-quality primer before painting ensures better adhesion and prevents peeling over time.
2. Prepare Your Cabinets for a Smooth Finish
Preparation is key to achieving a flawless finish when DIY painting bathroom cabinets. Follow these essential steps:
- Remove cabinet doors, handles, and hinges
- Clean the surfaces with a degreaser to remove dirt and grime
- Sand lightly to help the paint adhere better
- Apply primer to create a smooth, even base for painting
Skipping these steps may result in a rough or uneven finish.
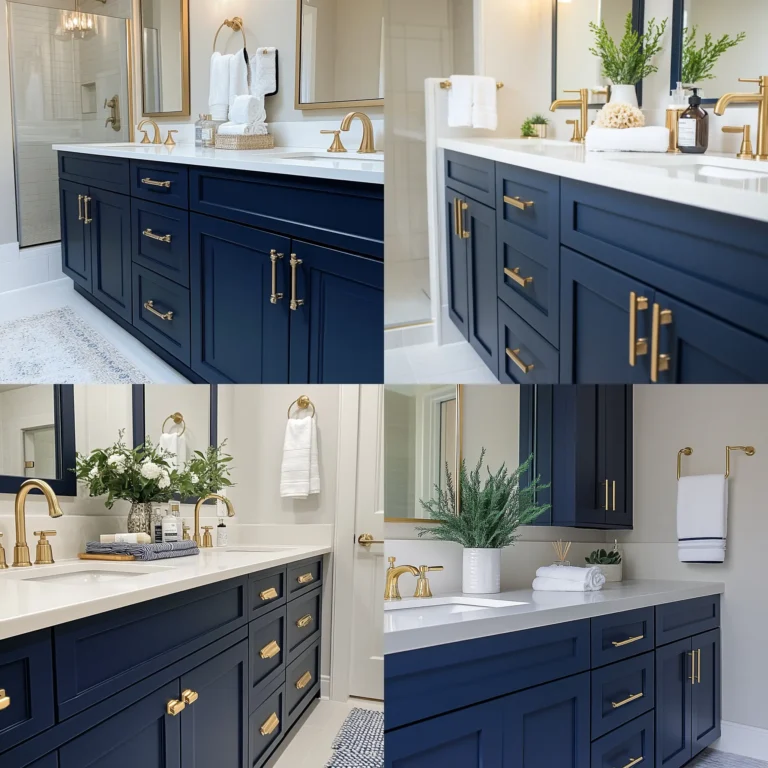
3. Select the Perfect Color for Your Bathroom Style
Choosing the right color can make a huge difference in the final look of your bathroom cabinets.
- White & Neutral Shades – Create a clean, modern look
- Bold Colors – Navy blue, emerald green, or black add drama and elegance
- Pastels – Soft pinks, blues, or greens provide a fresh and airy feel

4. Use the Right Painting Technique
A professional-looking finish depends on the painting technique you use. Here are some tips:
- Use a high-quality brush or roller for even application
- Apply thin, even coats instead of one thick coat
- Let each coat dry completely before adding another layer
- Seal the paint with a clear topcoat for extra durability
Taking your time with these steps will ensure a smooth and long-lasting finish.
5. Reassemble and Add Finishing Touches
Once the paint is completely dry, it’s time to reassemble your cabinets. Attach the doors and install new or cleaned-up hardware for a polished look. Adding stylish handles or knobs can give your cabinets a brand-new feel.
Related Resources
Looking for more home improvement ideas? Check out this blog for inspiration.
FAQs About DIY Painting Bathroom Cabinets
Q1: How long does it take to paint bathroom cabinets?
A1: The process can take 2-3 days, including preparation, painting, and drying time.
Q2: What is the best finish for bathroom cabinets?
A2: Semi-gloss or satin finishes are best because they resist moisture and are easy to clean.
Q3: Can I paint bathroom cabinets without sanding?
A3: Yes, but using a good bonding primer is essential for proper adhesion.
Q4: How can I prevent brush strokes when painting cabinets?
A4: Use a foam roller or high-quality brush and apply thin, even coats.
Q5: How long should I wait before using the cabinets after painting?
A5: Wait at least 24-48 hours before reattaching and using the cabinets to ensure the paint is fully cured.
With these DIY painting bathroom cabinets tips, you can transform your space effortlessly and on a budget. A little effort goes a long way in making your bathroom look stylish and refreshed!