
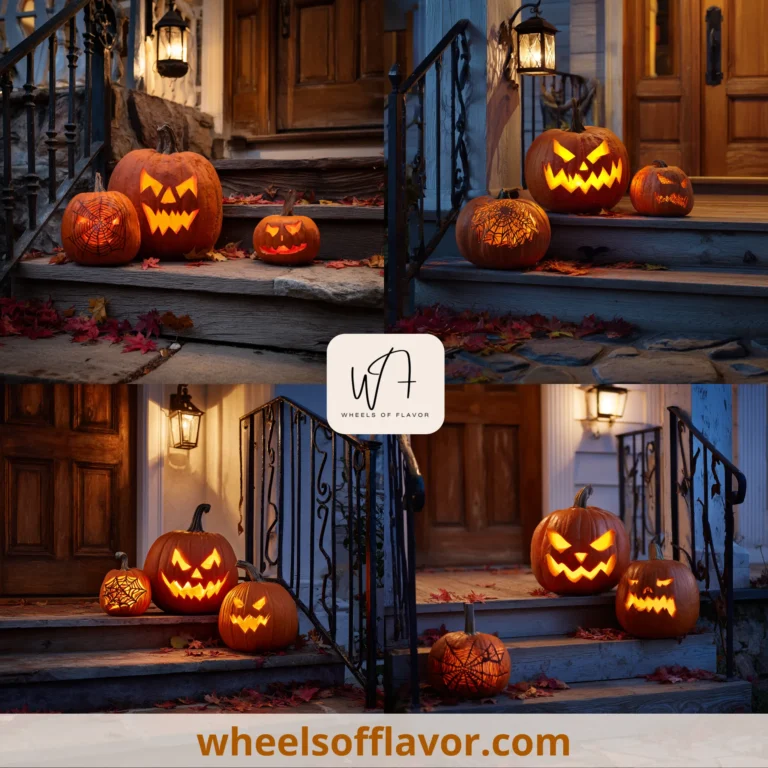

As autumn leaves fall and Halloween approaches, nothing signals the spooky season quite like the eerie glow of carved pumpkins scary enough to send shivers down your spine. These iconic decorations have been a staple of Halloween traditions for centuries, transforming ordinary gourds into haunting masterpieces that captivate both young and old. The importance of creating truly frightening carved pumpkins goes beyond mere decoration—it taps into our collective fascination with fear, storytelling, and seasonal rituals. A well-executed scary jack-o’-lantern can set the tone for your entire Halloween display, turning a simple porch into a gateway to the macabre. Whether you’re hosting a haunted house or simply welcoming trick-or-treaters, mastering the art of intimidating pumpkin carvings ensures your home stands out in the neighborhood. This tradition, rooted in Irish folklore about Stingy Jack, has evolved into a creative outlet where craftsmanship meets horror. In today’s world, where Halloween decor has become increasingly elaborate, knowing how to carve pumpkins that genuinely terrify adds authenticity to your celebrations. It’s not just about cutting shapes—it’s about understanding lighting, expression, and the psychological elements that make something truly scary. From classic jagged grins to intricate horror scenes, the possibilities are endless. Embracing this dark artistry connects us to seasonal cycles and community traditions while allowing personal expression through spine-tingling designs. As we delve into the techniques and inspirations for carved pumpkins scary enough to haunt dreams, remember that the goal is to balance fright with fun, creating memories that linger long after the candles burn out.
Essential Tools for Creating Carved Pumpkins Scary Designs
Achieving truly terrifying carved pumpkins scary enough to impress requires the right tools beyond basic kitchen knives. Start with a pumpkin carving kit, which typically includes serrated saws perfect for detailed work and scoops for efficient gut removal. These specialized tools allow for precision when crafting menacing eyes or jagged teeth that define scary designs. For advanced creators, consider wood carving tools or linoleum cutters for intricate patterns like skeletal hands or spider webs. A power drill with various bit sizes can create uniform holes for stippling effects or star-filled night skies on your pumpkin's surface. Don't overlook lighting—LED tea lights or colored bulbs enhance the eerie glow better than traditional candles, which can soften features over time. When selecting pumpkins, choose ones with flat surfaces for stability and thick walls that support complex carvings. Preparing your workspace with newspapers and having a bowl for seeds makes cleanup easier. According to experts at Martha Stewart Living, using a marker to sketch designs before cutting helps maintain accuracy for frightening expressions. Proper tool maintenance, like sharpening blades mid-project, ensures clean lines that make carved pumpkins scary and professional. Remember to work slowly, especially with delicate areas like fangs or narrow bridges between cuts. Safety is crucial; always cut away from your body and supervise children. With these tools, even beginners can create carved pumpkins scary enough to become the centerpiece of Halloween decor. Store tools properly for reuse next year, making this a sustainable seasonal practice.
Step-by-Step Guide to Carved Pumpkins Scary Patterns
Creating carved pumpkins scary patterns involves a methodical approach that transforms simple gourds into nightmare fuel. Begin by washing the pumpkin and cutting a lid at a 45-degree angle to prevent it from falling inside. Scoop out all pulp and seeds thoroughly, scraping the inner wall until smooth for even lighting. For truly scary designs, sketch your pattern first using a washable marker—options range from classic ghost faces to more elaborate scenes like screaming skulls or haunted houses. When cutting, start with the smallest details like pupils or teeth, as these require steady hands and are harder to fix if mistakes occur. Use a push-pin technique to transfer printed stencils onto the pumpkin surface for precision. For depth and dimension, try shaving the pumpkin's skin instead of cutting all the way through, creating shadow effects that make carved pumpkins scary even in daylight. Incorporate multiple layers by carving at different depths; for example, shallow cuts for background elements and deep cuts for foreground features like grasping claws. Lighting placement is key—position your light source slightly off-center to cast distorted shadows that amplify the fear factor. If using candles, ensure proper ventilation by carving small holes in the back. For a modern twist, consider projection mapping techniques where animated patterns are cast onto plain pumpkins. Practice on smaller gourds first to refine skills. This guide ensures your carved pumpkins scary creations not only look professional but also withstand the elements throughout October. Share photos online to inspire others and keep a portfolio of designs for annual traditions.
Innovative Ideas for Carved Pumpkins Scary Themes
Elevate your Halloween decor with innovative themes that take carved pumpkins scary to new heights of creativity. Move beyond traditional faces by incorporating pop culture horrors—think Pennywise from IT or demogorgons from Stranger Things, using reference images for accuracy. Thematic groupings can tell a story, like a pumpkin family with progressively scarier expressions or a graveyard scene with tombstones carved into multiple pumpkins. For interactive elements, create carved pumpkins scary enough to incorporate motion sensors that trigger lights or sounds when approached, adding a jump-scare element. Consider 3D carving by stacking pumpkins to form towering monsters or using pumpkins of different sizes for proportional depth. Nature-inspired horrors, such as pumpkins being consumed by wooden tendrils or with animal skulls emerging, blend organic and macabre elements. According to DIY network resources, using unconventional tools like soldering irons can burn designs for a smoky, aged effect that enhances scariness. Color variations also play a role; paint pumpkins black before carving for a silhouette look or use red lighting for a bloody ambiance. Themed sets based on horror genres—like zombie apocalypses or vampire lairs—create cohesive displays. For indoor use, miniature carved pumpkins scary enough to adorn mantels can be paired with dry ice for fog effects. Collaborate with friends for a pumpkin carving party where different themes are assigned, resulting in a diverse collection. These ideas not only make your decorations unique but also engage viewers in immersive experiences that celebrate the art of fear.
Conclusion
Mastering the art of carved pumpkins scary designs transforms Halloween from a simple holiday into an immersive experience rooted in creativity and tradition. Throughout this guide, we've explored essential tools, step-by-step techniques, and innovative themes that empower you to create jack-o'-lanterns that genuinely terrify and delight. The journey from selecting the perfect pumpkin to illuminating your final masterpiece underscores how this seasonal practice blends craftsmanship with storytelling. As Halloween evolves, the demand for more elaborate and frightening decorations grows, making these skills increasingly valuable for community events and personal enjoyment. Looking ahead, consider integrating technology like smart lights or augmented reality to push boundaries further, while preserving the handmade charm that makes carved pumpkins special. Sustainability is key—compost your pumpkins after the season or preserve them with vinegar solutions for longer use. We encourage you to experiment fearlessly, learn from each carving, and share your spine-chilling creations to inspire others. For more home decor inspiration, explore our guide to autumn table settings that complement your Halloween display. Remember, the goal isn't just to scare but to create lasting memories and uphold a beloved tradition. As you light your carved pumpkins scary enough to ward off spirits, take pride in contributing to the magic of the season. Happy haunting, and may your designs be the talk of the neighborhood!
Frequently Asked Questions
Q: How long do carved pumpkins scary designs typically last before rotting?
Carved pumpkins scary designs usually last 3 to 7 days, depending on weather conditions. In cooler, dry climates, they may stay fresh up to a week, but warmth and humidity accelerate decay. To extend longevity, keep pumpkins out of direct sunlight, apply petroleum jelly to cut edges to seal in moisture, and consider spraying with a bleach solution (1 teaspoon bleach per gallon of water) to inhibit mold. Refrigerating them overnight can also help, but for best results, carve closer to Halloween or use artificial pumpkins for reusable scary designs.
Q: What are the safest lighting options for carved pumpkins scary enough for homes with children or pets?
For safety, avoid open flames like candles, which pose fire risks and can be knocked over. Instead, use battery-operated LED lights, which are cool to the touch and eliminate burn hazards. Flameless candles or fairy lights provide a flickering effect without danger. Place lights securely inside the pumpkin, and ensure wires are tucked away to prevent tripping. For extra caution, opt for pumpkins with battery compartments or remote controls, allowing easy on/off switching. Always supervise displays around curious kids and pets to prevent accidents.
Q: Can I paint carved pumpkins scary designs instead of carving to make them last longer?
Yes, painting is an excellent alternative for durable carved pumpkins scary designs. Use acrylic paints to create detailed horror scenes on the pumpkin's surface without cutting, which prevents internal moisture loss and rot. This method allows for intricate patterns like ghosts or monsters that remain vivid for weeks. Seal with a clear spray to protect from weather. For a hybrid approach, combine painting with shallow carvings for texture. Painted pumpkins are ideal for early October displays or indoor use, offering reuse potential if stored properly.