


Are you tired of searching for a perfect anvil that fits your budget and needs? DIY anvil ideas offer a game-changing solution for hobbyists, blacksmiths, and crafters looking to build their own sturdy tools without breaking the bank. Anvils are essential for shaping metal, leatherwork, and various DIY projects, but commercial options can be pricey or hard to find. By exploring DIY approaches, you can customize the size, weight, and material to suit your workspace, saving money and unleashing your creativity. In this article, we dive into 14 innovative DIY anvil ideas that are easy to build with common materials like scrap steel, railroad tracks, or repurposed tools. Whether you’re a beginner or an experienced maker, these projects emphasize safety, functionality, and cost-effectiveness. Learn how a homemade anvil can boost your productivity and add a personal touch to your workshop. Plus, with step-by-step guidance, you’ll discover how to tackle challenges like heat resistance and stability. Embrace the DIY spirit and transform your crafting space with these practical and inspiring ideas—no prior experience required!

DIY Anvil Ideas Using Railroad Tracks
Railroad tracks are a popular choice for DIY anvil ideas because they're durable, widely available, and made of high-carbon steel that withstands heavy pounding. To start, source a section of discarded railroad track from scrap yards or online marketplaces—aim for at least 12 inches in length for stability. First, clean the track with a wire brush to remove rust and debris. Then, use an angle grinder to shape the top surface into a flat face, mimicking a traditional anvil. You can also carve a horn or step for detailed work. Secure the track to a sturdy wooden stump or metal stand using heavy-duty bolts to prevent movement during use. This project costs under $50 and takes about 2–3 hours, making it ideal for beginners. For added functionality, consider hardening the surface with heat treatment, though this requires caution and proper safety gear. Railroad track anvils are perfect for blacksmithing, metal forming, and general repairs, offering a weight of 50–100 pounds depending on the section. Remember to wear gloves and eye protection while working. These DIY anvil ideas not only save money but also recycle materials, reducing waste. If you need more inspiration, check out this guide on metalworking basics from a trusted source like Popular Mechanics. For related projects, explore our internal resource on budget-friendly tools at https://wheelsofflavor.com/diy-workshop-essentials.
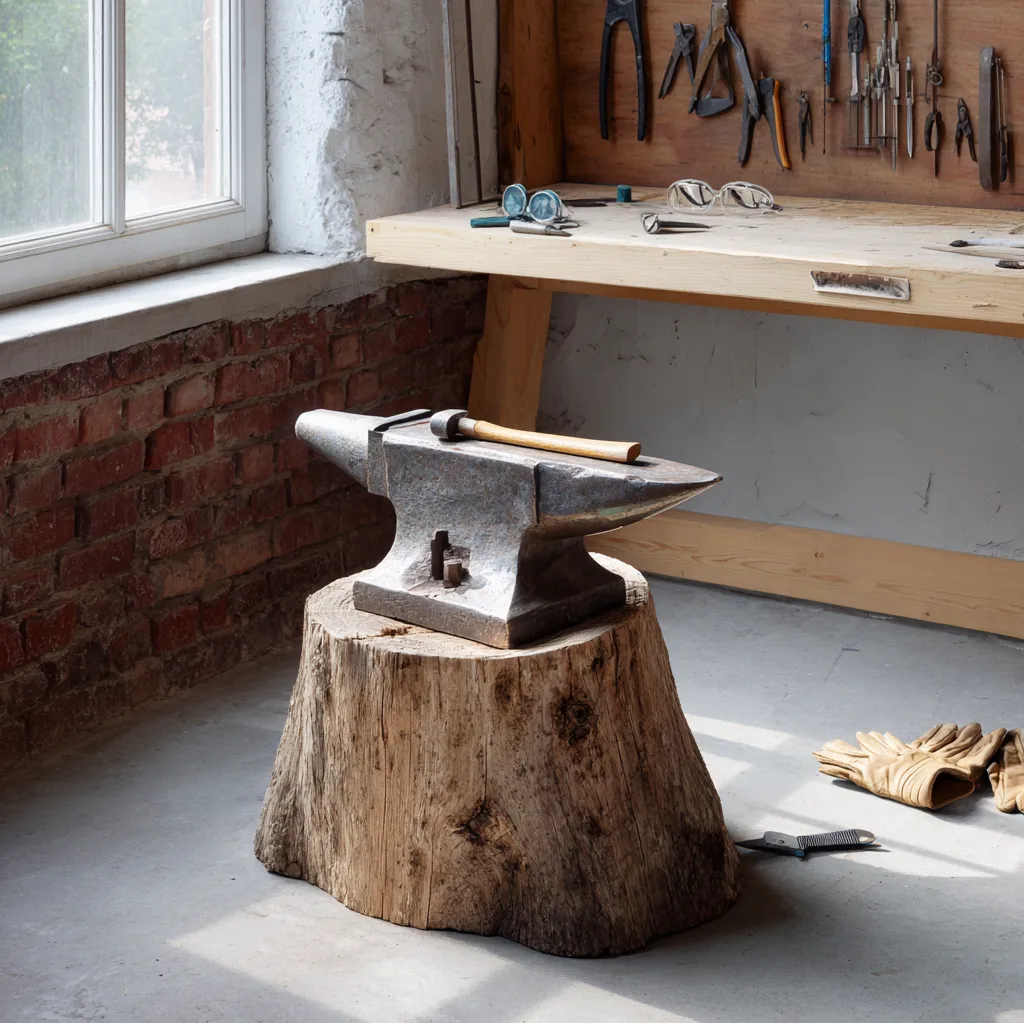
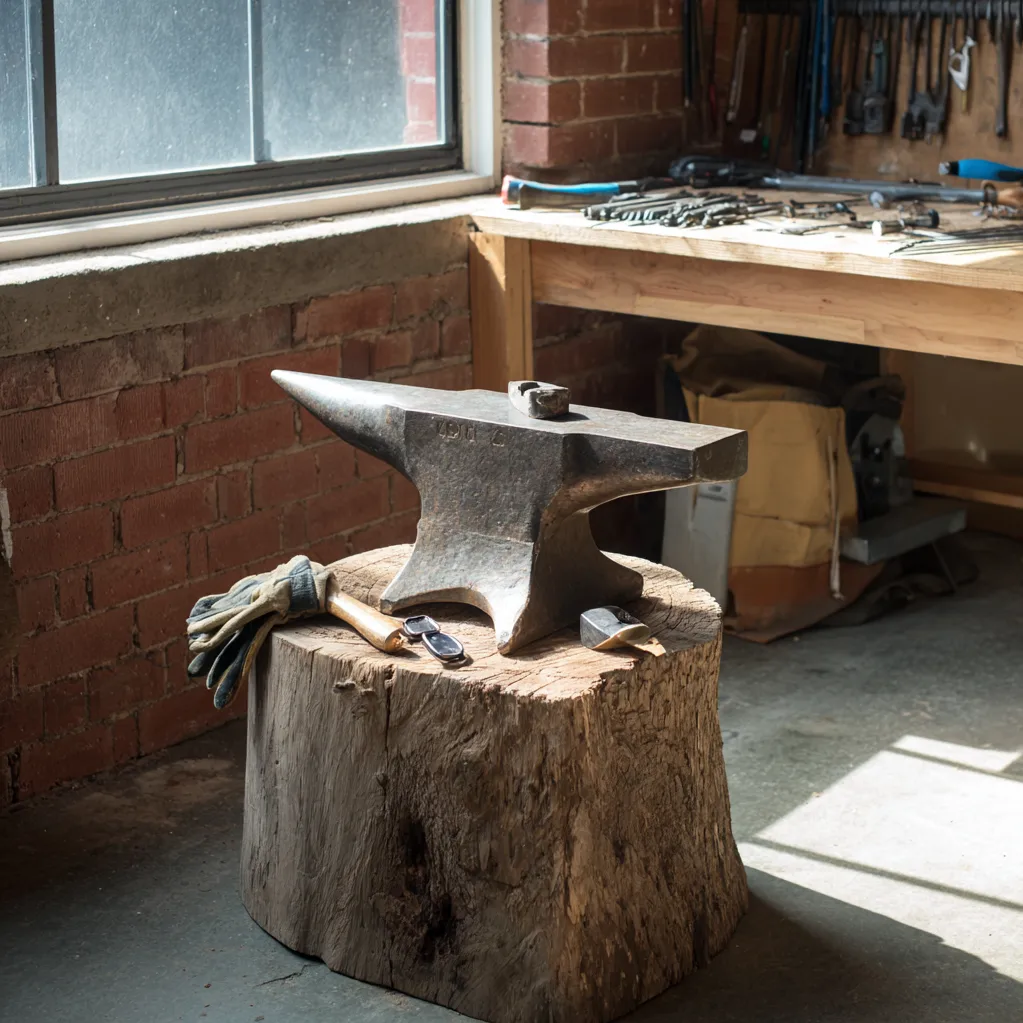
DIY Anvil Ideas from Scrap Steel Blocks
Scrap steel blocks are another fantastic base for DIY anvil ideas, offering versatility and strength for various crafting needs. Look for discarded machinery parts, large bolts, or steel billets at local metal suppliers or junkyards—a block weighing 20–50 pounds works well. Begin by inspecting the steel for cracks or weaknesses; if it's in good condition, grind the surfaces smooth to create a flat striking area. You can weld additional pieces to form a horn or pritchel hole for punching tasks. Mount the block on a heavy base, such as a tree stump filled with sand, to absorb shock and reduce noise. This project emphasizes customization; for example, add a hardy hole by drilling and filing a square opening to hold tools. Cost-wise, scrap steel anvils often come in under $30, plus minimal tools like a welder and grinder. They're excellent for light forging, jewelry making, or leather stamping, and their compact size fits small workshops. To enhance durability, consider case-hardening the surface with a torch, but always prioritize safety with fire-resistant clothing. These DIY anvil ideas teach valuable skills in metalworking and repurposing, aligning with sustainable practices. For further reading, refer to authoritative blogs like The Family Handyman for tips on tool maintenance. Don't forget to browse our internal guides at https://wheelsofflavor.com/upcycling-projects for more budget-friendly inspirations.
DIY Anvil Ideas with Repurposed Tools
Repurposing old tools into DIY anvil ideas is a creative and eco-friendly way to build functional equipment without spending a dime. Common items like sledgehammer heads, large wrenches, or even axe heads can be transformed into mini-anvils for detailed work. Start by selecting a solid, heavy tool—for instance, a sledgehammer head weighs 10–20 pounds and provides a robust surface. Clean it thoroughly, then mount it securely in a vise or on a wooden block to serve as a stable base. You can modify the tool by grinding edges for different shapes or adding features like a rounded horn from a pipe section. This approach is perfect for small-scale projects like riveting, bending metal, or crafting jewelry, and it takes less than an hour to assemble. The benefits include portability and low cost, as many tools are found in garages or thrift stores. However, ensure the tool is made of hardened steel to avoid deformation under impact. Always test it with light taps first and use protective gear. These DIY anvil ideas encourage innovation and reduce clutter, turning unused items into valuable assets. For expert advice, visit high-authority sites like Instructables for step-by-step tutorials. To explore similar hacks, check out our internal page on tool repurposing at https://wheelsofflavor.com/creative-repurposing.
DIY Anvil Ideas for Beginners and Safety Tips
If you're new to DIY anvil ideas, start with simple projects that prioritize safety and ease of use. Beginner-friendly options include using a large vise attached to a workbench or a concrete-filled pipe as a basic anvil. These require minimal tools and can be assembled in under an hour. For example, fill a steel pipe with quick-setting concrete to create a heavy, stable base, then cap it with a steel plate for the striking surface. Safety is crucial: always wear safety glasses, gloves, and ear protection to prevent injuries from flying debris or loud noises. Secure your anvil firmly to avoid tipping, and work in a well-ventilated area if using heat or chemicals. Common mistakes to avoid include using soft metals like aluminum, which dent easily, or skipping the hardening process for steel surfaces. Start with light projects to test your anvil's durability, and gradually move to heavier tasks. These DIY anvil ideas build confidence and skills, with costs ranging from $10 to $50. For detailed safety guidelines, refer to resources like the American Society of Safety Professionals. Additionally, our internal blog at https://wheelsofflavor.com/workshop-safety offers tips on setting up a safe crafting space. Remember, a well-built anvil enhances your DIY journey, so take your time and enjoy the process!
Conclusion
In summary, DIY anvil ideas open up a world of possibilities for crafters and makers, offering affordable, customizable solutions that fit any workshop. From railroad tracks and scrap steel to repurposed tools, we've explored 14 incredible projects that emphasize creativity, sustainability, and practicality. These ideas not only save money but also teach valuable skills in metalworking and tool maintenance, making them accessible for beginners and experts alike. By building your own anvil, you gain a deeper understanding of how tools function and can tailor them to specific tasks, whether it's blacksmithing, jewelry making, or general repairs. Looking ahead, the trend of DIY and upcycling is set to grow, driven by a desire for self-sufficiency and environmental consciousness. As you embark on your next project, remember to prioritize safety and start small to build confidence. The future of crafting lies in innovation—so why not experiment with new materials or combine ideas for a hybrid anvil? Share your creations online to inspire others, and keep exploring resources like our blog for more tips. With these DIY anvil ideas, you're not just building a tool; you're crafting a legacy of ingenuity and hands-on learning. Get started today and transform your workspace into a hub of productivity and pride!
Frequently Asked Questions
Q: What materials are best for DIY anvil ideas?
The best materials for DIY anvil ideas include high-carbon steel, such as railroad tracks or scrap steel blocks, because they are hard and durable enough to withstand repeated impacts. Avoid softer metals like aluminum or cast iron, which can dent or crack easily. Railroad tracks are a top choice due to their availability and strength, while repurposed tools like sledgehammer heads work well for smaller projects. Always ensure the material is free of cracks and has been properly hardened if needed for heavy use.
Q: How much does it cost to build a DIY anvil?
The cost to build a DIY anvil varies based on the materials and tools used, but most projects range from $10 to $100. For example, a railroad track anvil might cost under $50 if sourced from scrap, while repurposed tool anvils can be virtually free if you already have the items. Additional expenses may include tools like angle grinders or welding equipment, which can be borrowed or purchased secondhand. Overall, DIY anvil ideas are significantly cheaper than commercial anvils, which often start at $200 or more, making them a budget-friendly option for hobbyists.
Q: Are DIY anvils safe to use for blacksmithing?
Yes, DIY anvils can be safe for blacksmithing if built and used correctly. Key safety measures include securing the anvil to a heavy, stable base to prevent tipping, wearing protective gear like gloves and safety glasses, and ensuring the striking surface is made of hardened steel to avoid chipping. Avoid materials that are too soft or brittle, and always test the anvil with light strikes first. For beginners, it's wise to start with simpler projects and gradually progress to heavier tasks. If in doubt, consult online tutorials or guides from authoritative sources to ensure proper construction and usage.